Terrariums – my other passion
Posted: April 1, 2011 Filed under: Indoor gardening | Tags: Africa Violet, British Columbia, Canada, Charity shop, Craft, DIY, easy, ferns, gardening, glass container, Home and Garden, Houseplant, indoor, moss, Nanaimo, Needlework, pebbles, Plant, recycle, repurposed, sand, soil, terrarium, Thrift, thrift store, upcycle, Vancouver Island 8 CommentsJust a short digression into my latest hobby – creating Terrariums.
I love gardening and plants in general (I used to be a professional botanist in a earlier life), but I have been very taken with terrariums recently. Perhaps it is because this last winter was so long and rainy, that I couldn’t get out into my real garden so I had to find a way to garden indoors. In any case, I believe plants are good for the air quality in homes that are closed off from the outside, like ours are during long Canadian winters. Gardening is good for my mental health too.
The middle picture in my “inspiration” collage of the orchid terrarium got me from just thinking about terrariums to actually making one – isn’t it gorgeous?

I have been trying to find Lady Slipper orchids to create my own, but they are really hard to find. (If anyone knows where to find them on Vancouver Island or Vancouver / Lower mainland, please let me know).
I started looking out for apothecary jars and other suitable glassware in TS, and found lots! For a few dollars one can find all sorts of lidded glass containers, and turn them into terrariums with a few small plants from your local nursery. Here are 2 I made from lovely “Apple and pear” glass containers:

One thing I learned fast is that you have to use plants that come in 2 inch pots – anything else has a root ball that is just too deep. Take note of the height of the glassware – it is the limiting factor. The plants at the rear of the photo proved to be too big for my jar -it is a good idea to measure your jar before shopping for plants.
If the jar is sealed, SMALL tropical plants, mosses and ferns are suitable choices. Sealed jars have high humidity, so the main problem you will find is that plants die because they don’t like their “feet wet”- they cannot tolerate soil that is too wet as it literally drowns the roots.

Rot and mould set in pretty quickly so one has to be very careful not to over-water. Misting your terrarium is miles better than watering. In fact, if your soil is damp, don’t add any more water – what water there is will be recycled by the plants, and you will hardly ever have to water at all. If there is a lot of condensation on the inside of the container, remove the lid for a few hour to let it dry out.
Unsealed terrariums created with succulents and cacti are also great – that is next on my list of projects to do. Even if the jar /container is not sealed, it still acts as a hot house, so be careful of placing terrariums in direct sunlight or the plants will literally “cook” in the heat.
There are a lot of great sites with instructions regarding creating terrariums on the internet. This is a great project for children and can be a great opportunity to introduce them to recycling.
Here is my quick “how to”:
1. Find a suitable clear glass jar (Thrift stores are great for this). None of these cost more than a few dollars. Cookie jars, storage containers and large Mason Jars work just great! To start with, select jars you can get your hand into. Wash and dry them well to get rid of any possible substances that may kill your plants.

2. Place a 1/2 inch layer of washed pebbles on the bottom of the container for drainage:

3. Pat the pebbles down, then add a 1/2 inch of sand (if you use sea sand from a beach, wash it well first to get rid of the salt). Pat it down well. I like to see the well-defined layers…

4. Add about 1/4 inch of potting soil (very sparing if using cacti/succulents) – once you add your plants, you will add more soil. Arrange your plants in an attractive display outside the jar first, then remove them from their pots GENTLY. Place them in the jar, with some taller plants towards the middle and smaller ones around the outside. I like to use variegated plants to add interest. Miniature African Violets are great for adding a pop of colour.

5. Fill up the spaces between the plats with soil sparingly! It is a pain if you get soil all over the plants, so use a paper or plastic funnel to direct the soil to where it is needed. Pat the soil down with fingertips.
6. Clean the inside of the glass again.
Here the large terrarium is in situ in my sunroom. I kind of spread mine around the house, but they look great clustered together like in the picture above.

Tammy has totally piqued my interest in tangerine..nothing says SPRING like tangerine!
Have a great day,
Pippa
What makes a thrift store great?
Posted: March 24, 2011 Filed under: Thrifting | Tags: addiction, British Columbia, Canada, Charity shop, inexpensive, Nanaimo, PArksville, recycle, repurposed, Shopping, Thrift, Thrift Stores 1 CommentIt’s no secret that I am a Thrift Store enthusiast… I call them “the shop you go to, to get something you didn’t know you wanted until you saw it”. A bit long-winded I know.. I never use one word when 10 will do the job!
My Thrift Store “addiction” is a bit of a running joke in our household. It is no secret that I can’t get through a week without at least one visit. My answer to every ,”Oh, that’s nice. Where did you get it?” is so often “The Thrift Store” that friends and kids have stopped asking. Now it’s more like “Which Thrift Store did you get THAT from?” …or in the husbands version, “..that JUNK from” 😉
The funny thing (ironic funny not ha ha funny) is that lately when I have dragged him to a TS for some recreational retail therapy, he has found so many great bargains, now he suggests we go “Thrifting“. The fact is, what I spend in a TS in a month, is what most people spend just on the taxes on their purchases in a mall. Thrifting makes me happy. I only shop in a mall when I am in a bad mood already! I don’t HAVE to shop thrift stores, I just chose to reuse, recycle and save $$$ – and redirect the dollars I save to more important things like..oh…my kid’s secondary education and paying down my mortgage.
Lately I have started “rating ” TS (Thrift Stores) in my own mind. I started to think about what makes a TS really great? Some just “check all the boxes” and draw the people in in droves, yet others are dormant and like ghost towns with nary a customer in sight.
I live near Nanaimo, and frequent the SOS TS in Parksville, BC …fondly known locally as “Our Big Box store“. That place is always humming with activity, and finding parking within a block radius is sometimes a problem. It just has such a positive energy, and evidently has a huge turnover. I was in the elevator with an elderly couple recently, and they commented on my cart FULL of awesome deals – typical – everyone talks to each other there. I laughed, “I get such great stuff here!”, and they chuckled,” So do we, we love this place”. I overheard a woman telling a friend that she drives from Port Alberni (70 Kms away, over a mountain pass) once a week just to shop there. Many people like it so much that they specify in their wills that SOS inherits their estate (it may, however, be because they support the programs SOS sponsors). The only downside is that it closes at 4:00 pm so working people can often not get there during working hours….but I understand..it is mostly staffed by volunteers,and they have their own lives to get home to.
On the other hand, there is another store within 10 km’s of SOS that is pretty much deserted every time I have been there. When I was there last, a harassed young lady was packing boxes of goods. She had been hired to box goods, ready for someone to haul them to SOS. People had donated the salable goods to them to support their cause, but their prices are so ridiculously high that most seasoned TS shoppers would not go there more than once. The inventory has hardly changed in the year I have been going there. It is crammed to the ceilings with great, overpriced stuff that , quite frankly, has passed it’s “best before” date because the place doesn’t smell so fragrant . This gives “Thrift Store” a new meaning…they prefer to STORE the donations they are given, than sell them for a reasonable price. Then they have to spend hard cash to hire someone to box it and haul it away – a nett loss. I’m no businesswoman, but that just seems a little cockeyed to me.
What are the most important criteria for a great TS in your opinion? Accessibility? Prices? Shopping hours? Odour control? Inventory changing often? Management? Percentage of profits to charity? The cause or programs it supports? Other?
Let me know what you think,
Pippa
Anne blouse pattern: sheer loose fitting, with batwing sleeve
Posted: March 23, 2011 Filed under: Sewing Pattern: tops | Tags: Arts, batwing, blouse, Craft, cropped, DIY, easy, free, garment, inexpensive, pattern, Patterns, recycle, repurposed, Seam types, sewing, sheer, Sheer fabric, sleeveless, South Africa, Spring, Textile, top, upcycle 7 Comments
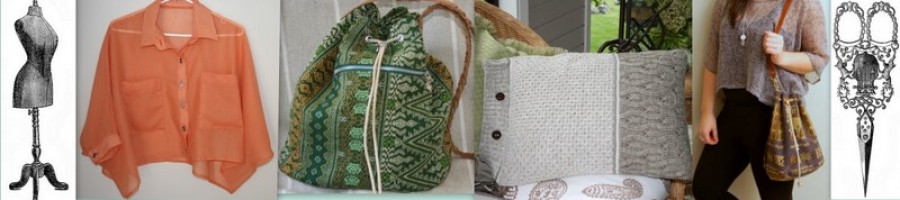
I love these loose-fitting, draped blouses as throw-overs for summer. The right hand one comes from one of my fav sites (Burda) offers free patterns.

They are such fun, and quickly give an updated look when popped over a tank and leggings. These are some pictures from various websites that I took inspiration from for a cropped batwing sleeve pattern I have called “Anne” after an old friend who was slightly “batty” (love her quirkiness)!

Here is my version, modeled by my favorite “tester” , who gets to try out my patterns and offer constructive comments. It is apparently versatile and comfy to wear. Download the pattern from the “Box” widget in the right hand side bar.

"Anne" loose batwing top
It is super easy to make. I purchased 60 centimeters (or 0.6 m) of sheer fabric for this project – a lovely chiffon which has a lovely drape. It was a very wide fabric, so you may need more if your fabric is narrower.
I think any lightweight, sheer fabric that has a nice drape would be good for this. Chiffon is quite pricey ($15 per meter) but you could also try making it from a remnant, a fine old table cloth or sheer / lacy curtain. After I made this (dang), I saw a beautiful size XXXL chiffon dress ($5) in the TS *recently that would have probably made 2 of these. The large size clothing and night wear racks are always “happy hunting grounds” for fabric. *(I’m going to say “Thrift Store” so often I may as well start abbreviating it!)
The neck opening is quite scooped so it does end up quite large – don’t enlarge it or it may fall off the shoulder! Meryl likes the scooped neck, because if she wants to, she can pull it down at the back, making the front extra cropped showing some midriff. The neckline then fits at the neck base, with the back draped asymmetrically. She also pulls it to one side sometimes, exposing one shoulder.
I used a serger (overlocker in South Africa) for the seams, but if you have a regular machine, try doing a french seam when sewing these very fine sheer fabrics. (Instructions here or http://www.sewneau.com/how.to/french.seam.html
Here is the free pattern if you’d like to try it. Anne top Pattern or Download the pattern from the “Box” widget in the right hand side bar.–>
Print it off and join the pieces together , matching the symbols. Both pattern pieces are placed on the fold along their center line.
I didn’t take any photos of the sewing process, so I cannot post “How to” pics, but if you would like me to, please leave a comment.
Method:
It only has 2 seams (shoulder and underarm), and the arm and waist edges are just hemmed with a narrow hem. If you have a roll-hemmer setting on your serger , you could use that to finish the edges instead – it depends what look you like.
1. Sew ONE shoulder seam together. This fabric was VERY slippery to sew, so I actually “cheated” a bit, and did not cut the shoulder seam for this particular top, but just put the pattern on the fold of the fabric. I folded the fabric in half , then half again, and basically cut a hole for the neck. The shape of the garment would be better with a shaped shoulder seam though.
2. Bind the neck opening (**remember it’s always easier to work flat than once the other shoulder seam is sewn) I just serged the edge of the neckline and turned it under, and sewed it down (since this was just a “test”), but I think it would look better bound with bias binding in the same fabric. (see earlier “Meryl” top for Bias Binding Tutorial)
3. Sew the other shoulder seam together.
3. Sew the arm hems. Ditto for comment above**. You could also thread elastic or a cord / ribbon through the arm hem if you want it to gather up slightly, but if you decide to do that, sew the underarm seams first so the armhole is a continuous loop.
4. Sew the underarm seams. Hem the lower edge with a narrow hem. Alternately you could add on another 2 inches in the length and make the hem much wider.
Press all seams down so the lie flat….and you’re done!
I hope you like it. In my next post I will show you another version with a collar that I made for a friend Tammy.
Keep well,
Pippa
Rising clothing prices
Posted: March 23, 2011 Filed under: Uncategorized | Tags: ADD, addiction, Canada, Charity shop, Clothing, Craft, Crafts, DIY, easy, Fashion, free, garment, inexpensive, Needlework, Patterns, recycle, repurposed, Sew, sewing, South Africa, thift store, Thrift, Women Girl Garments Sewing Leave a commentI have read/heard recently that clothing is going to be very much more expensive soon due to the rise in cotton prices. I guessing that , as clothing manufacturers jack their prices up, sewing and clothing construction skills will become much more important than they have been in the last 20 years. My concern is that many young people have grown up not learning skills that my generation did, simply because it was cheaper and easier to buy clothing than to make it.
I don’t even make ALL of my own clothes as I used to before I emigrated to Canada – finding what I need at thrift stores, and making slight adjustments is quicker and less expensive …in fact I can get high quality articles there that I would not normally be able to afford like brand labels Mex and Jones New York etc. The point , however, is that I wear “classic’ designs more suited to my “age and stage” that have made their way to the thrift store. Modern trendy styles that more fashionable people are looking for are usually in short supply.
I thought if I shared some patterns of modern, fashionable designs that employ simple techniques, it could help young people who are more fashion conscious to either make clothes from scratch, or re-purpose vintage items to make them look more trendy. With all the bad news out of Japan recently, it looks like the recession is going to deepen, not get better anytime soon. Most of your very high fashion pieces for this season will be out of fashion next year, so they don’t have to be made to last forever like they did in Victorian times! Using easy shortcuts that are not as complicated as “traditional” techniques, saves time and money.
Over the next little while I will share some thoughts about the following:
1. creating fashionable designs from clothing where the difficult parts are already done (like collars, cuffs and buttons). My aim is to design patterns that are quick and easy to create, so you get maximum impact for minimum effort and cost. I hope to motivate people to reuse and recycle the cotton and wool fabric we already have – tossing high fashion clothing after one season is such a waste of the earth’s resources, IMHO (in my humble opinion).
2. sourcing and availability of fabrics/notions/ etc. If you are a sewer, you have probably noticed (as I have) that the variety /choices in sewing notions has narrowed and quite hard to find (not to mention expensive). It may just be that I live in a small town on an island? Perhaps it because not as many people were sewing, and large chain stores have a stranglehold on the market, squeezing little companies and local “Mom and Pop” shops out.
3. I’m wondering if there is a need for online forums for sewing co-operatives and swap meets – I think there are probably lots of the older retired persons who have skills or stores of notions and fabrics they would swap for dog walking or something a young person could do.
I’d welcome feedback and any tips you may like to share.
Pippa
